St. Patrick's Day is just around the corner, and we have shared many fun traditions for this holiday on this blog. Last year, I was busy homeschooling while having recently had my fourth baby, and I wasn't quite sure if I was up for all of the St. Patrick's excitement we had had in previous years. So we kept things fairly simple while still keeping traditions alive. We had fun reading aloud the Magic Tree House Book Leprechaun in Late Winter
and then we made Leprechaun traps out of Legos and Tinker Toys. I couldn't begin to explain to you how these various "traps" worked, but my kids had quite the elaborate and adorable explanations for how the various parts of their contraptions could trap a leprechaun. Unfortunately, we didn't catch any sneaky leprechauns, but chocolate gold coins made for some happy little children (thank you dollar store!)
It wasn't expensive, elaborate, or time consuming, but my kids still loved celebrating the holiday. And I hope you all have a lucky and happy March, whether or not you celebrate St. Patrick's Day.
My kids love the book The Night Before St. Patrick's Dayby Natasha Wingwhich is a twist on the classic "Night Before Christmas" poem. In the book, the children make various traps to try to "catch" a leprechaun. We have fun with this tradition as well. You can see some of our past leprechaun traps here and here. Last year, we made some simple leprechaun traps inspired by those in the book:
The first trap we made was based on the picture of a trap above that was on a hanger. We didn't have a collapsible vegetable steamer as it looks like the kids used in the book, so we just use a coffee filter (I buy packs of filters at the dollar store to use for crafts), that we hole punched and tied to the hanger with colorful yarn.
Inside we put some pretend gold coins to lure the leprechaun!
We also made a second leprechaun trap with a linking cube tower, topped by a toilet paper tube that we covered with green paper and St. Patrick's Day stickers. A homemade popsicle-stick ladder led up to the tube that had a tempting necklace hanging from it, and it led to a cup covered with shamrock stickers and another fake coin in the bottom.
This was inspired by the Lego/tin can/toilet paper tube trap shown in the illustration from the book above. It was fun to try to bring these "leprechaun traps" from the book to life. The next day, the traps were upset, and a little treat was left for the kids. I usually leave the kids chocolate gold coins from a pretend leprechaun. You can find gold coins at Trader Joe's, Party City, or sometimes the dollar store. We also like to throw a few things in our house topsy turvy as if a leprechaun has been making mischief. We hang toys from the ceiling fans, turn the kids' chairs upside down, and more. It doesn't take much to have a little fun and make a little magic with your kids. More ideas for leprechaun mischief can be found here.
Last year, one of our children was in the hospital with pneumonia on St. Patrick's Day, and he even made his own little trap out of things we were able to scrounge around the hospital. His trap was made from a styrofoam cup and pieces of paper he colored. The papers were all taped on his trap with medical tape the nurse gave us.
It taught us that you don't have to have something fancy or elaborate to have fun! Being sick in the hospital was miserable for him, but a special note from a "leprechaun" and a package of M & M's did wonders, cheering up this sick little boy on St. Patrick's Day morning.
For more St. Patrick's Day ideas, see our collection of previous posts here or my Pinterest board here!
Today is 3.14--Pi Day! In honor of this day, we like to eat pie. Here's a fast and easy ice cream pie that we will be eating today. My mom taught me how to make this when I was just a girl, and it is still a favorite of mine because I can mix it up quickly and it tastes delicious.
Ingredients:
One 1.5 quart carton vanilla ice cream
One 15 oz can frozen limeade concentrate
Green food coloring (optional)
Lime (optional)
One large graham cracker crust
Instructions:
Stir together ice cream and limeade concentrate. Depending on the size of your crust, you may not use all of the ice cream. You might have to soften the ice cream to make it easier to blend.
Add green food coloring if desired (without the food coloring, the pie will just take on the white color of the ice cream).
Add juice of a lime or lime zest if desired (I sometimes put in juice from a half of a lime--you could put up to a whole lime in if you like your pie tart, or you could leave out the fresh lime juice and it will still taste good).
Pour mixture in pie shell and freeze for five hours or overnight.
This is also a fun treat to make around this time of year as it is green for St. Patrick's Day. And if you were in the mood for another fast and easy pie, check out this chocolate oreo pie that is equally simple.
Do your kids love leprechaun mischief as much as mine? Here are some of our favorite St. Patrick's Day activities, treats, crafts, lessons and more! Most come from Mommy Lessons 101, but we've found some other sources we couldn't pass on sharing with you!
Here are two simple and fun St. Patrick's Day crafts we did last year:
Lucky Garden
I always like to take time and think about all the things I have to be grateful for. For St. Patrick's Day we made a "lucky garden" that was very similar to our "thankful turkey" we made at Thanksgiving. I cut out shamrock shapes and had my children write or draw pictures of things that made them feel "lucky." We then, taped these on to wooden skewers and poked the skewers into an old cereal box. I cut a piece of green construction paper to form "grass" to cover the front of our lucky garden. (I was inspired to do this by this post).
(My 2 1/2 year old was grateful for his blankie)
Shamrock Wreath
Another simple craft we made was this shamrock wreath. I gave my children pre-cut shamrock shapes (You can buy die cuts at a craft store or print out your own shamrock shapes to cut out). The kids colored the shamrocks and put St. Patrick's Day stickers on them. We then cut the middle out of a paper plate and glued the shamrocks around the the edge of the paper plate to form a wreath. We finished by taping a piece of yarn on the back of the wreath so that we could hang it from our door.
My kids love our annual tradition of creating a leprechaun trap and pretending to try to catch a leprechaun for St. Patrick's Day.
Here is the Leprechaun trap my four-year-old designed last year. It is made from a Lucky Charms cereal box that we added green paint to. Then, we created a ladder from barbecue skewers and chenille stems that led up to a trap door that we cut in the box. We added a leprechaun hat, green beads, and a trail of gold coins to entice the leprechaun. My son drew a rainbow picture that we taped above the trap to further lure the leprechaun.
We did not succeed in catching a leprechaun, but the leprechaun did leave behind a shamrock note with a clue leading to a treasure. The clues were very simple for my young kids--such as "look in the place where you keep the milk," or "look under the place where you rest your head at night." The kids followed the clues around the house on a treasure hunt--each clue was written on a shamrock and hidden in a different spot. Finally, they found the "pot of gold"--some gold Rolo candies, M & M's, and rainbow colored markers inside a rice pot of ours.
And if you are like me and always like to pair a picture book with your activities, here is a fun picture book to go along with this tradition:
The Night Before St. Patrick's Day by Natasha Wing.
In the book some kids spend the night before St. Patrick's Day setting Leprechaun traps, and they actually succeed in catching a leprechaun, but he outwits them.
My kiddos were so lucky to have a year of "Grandma School" with their cousins. Grandma did a preschool activity with them weekly and it was the highlight of their week. So here are some of her fun ideas for St. Patrick's Day!
Arts and Crafts
Tissue Shamrocks:
These are done by cutting squares (about 1"x1") of green tissue paper. She used different shades of green tissue paper for variety.
Place the squares on the bottom of a pencil eraser. Then dip the end into a pool of glue (I put it on a paper plate). Place the tissue with glue end on a shamrock shaped template. You can do this as many times as you want to fill the entire template.Then cut the shamrock out and voila, you have an adorable 3-D craft!
Science
Color Explosion Experiment:
Watch the above video to see the kids in action - they LOVED this! The kids used a pie pan full of milk and dropped various drops of food coloring in. Then taking a cotton swab dipped in dish soap, you can make all the colors explode and create a tie-dye sort of look. Check out a very detailed explanation on why this occurs at one of my favorite Science websites:
Storytime
Lots to choose from, but here are a few ideas...
Song I Can Sing a Rainbow:
I can Sing a Rainbow is a favorite amongst grandma and her grandkids. This time, two cute grandkids taught the others how to do the sign language along with the music (Here's a great video we found online that demonstrates it). I was impressed with how long the 2-3 year olds stayed at attention. It's all about teaching them kinesthetically or hands-on!
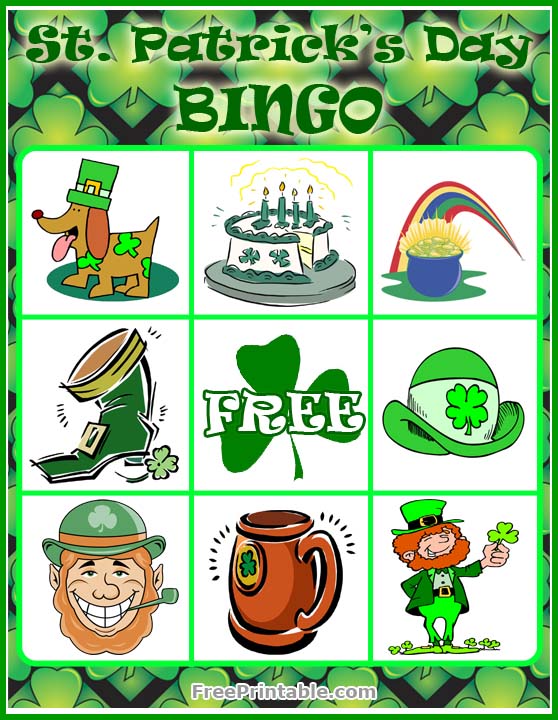
Game Bingo
St. Patrick's Day Bingo - there are countless free printables online, here are some of my favorites:
For an easy St. Patrick's Day breakfast last year we had these "pots of gold." We used toast as our "pot" and scrambled eggs as the "gold."
A tricky little leprechaun also turned our milk green (with a few drops of green food coloring), so that added to the fun of our breakfast meal.
For St. Patrick's Day dinner, we had the traditional corned beef. I cook my corned beef in a Crock-Pot with apple juice and a little bit of water (instead of beer), and then season it with the seasoning packet that comes with the corned beef.
CROCKPOT CORNED BEEF
Ingredients:
Corned Beef Brisket +seasoning packet
Garlic
Salt
Pepper
Apple juice
Water
Instructions:
1. Fill bottom of crockpot with about 1" of apple juice & water.
2. Put corned beef brisket in crockpot.
3. Top with seasoning packet that it came with, along with garlic, salt, and pepper to taste.
4. Cook on low for about 5 hours.
We did not have cabbage with our corned beef as many people do, since no one in our family likes cabbage. Instead, we just served this corned beef with mashed potatoes, some of our favorite green vegetables, and and Irish Soda Bread.
For dessert, we decorated shamrock shaped sugar cookies with green frosting and sprinkles. For more St. Patrick's Day desserts, check out some of our treat recipes here and here.
Ingredients:
1 cup water
2 T. yeast
2 tsp. honey
2 1/2 cups milk
1 stick butter
1/2 cup honey
4 tsp. salt
8 cups wheat flour
butter
salt
1. In a large bowl, mix 1 cup warm water, 2 T. yeast and 2 t.
honey. Stir this together and let it rise, while you do the next steps.
2. Melt a stick of butter in a large saucepan.
3. Add 1/2 cup honey, 4 t. salt and 2 1/2 cups of milk and mix together at medium heat.
4. Pour milk mixture into yeast mixture and stir.
5. Stir in 8 cups of flour, 2 cups at a time, and add more if needed to create dough consistency.
6. Knead the dough for 5-10 minutes.
7. Place it in a bowl, cover it and let it rise for 1 to 1 1/2 hours.
8. Pull the dough of the bowl and knead it a few times to get the air out. Pull a ball of dough, about the size of your fist.
9. Roll it into a long snake.
10. Then twist it into a traditional pretzel shape, valentine heart shape or even shamrocks! If they don't work at first, untwist them and try again.
11. After you shape each pretzel, put them on a cookie sheet about an inch apart. Bake for 20 minutes at 350 degrees.
12. Melt a stick of butter in a saucepan.
13. Right when you take the pretzels out of the oven, pastry brush them with butter generously.
14. Then sprinkle salt, cinnamon sugar, or colored sprinkles on them!
Leprechaun Hats
This craft is so super easy.
Supplies Needed:
White paper plate and white paper bowl (you want it to be paper, not coated with any plastic or
decorations)
Belt cut out of black construction or cardstock paper
Buckle cut out of yellow construction or cardstock paper
Glue
Green paint and paintbrush
Optional - piece of elastic
Instructions:
1. Paint the bowl and plate and let them dry.
2. Cut out belt and buckle out of construction paper.
3. Glue upside down bowl to right side up plate.
4. Glue the buckle to the belt and attach them both to the rim of the bowl.
5. Optional: You could easily attach a piece of elastic if you actually wanted
to wear it, or it could just be a fun craft/decoration.
In 3rd grade, I arrived at school and our classroom was in chaos. Chairs were upside down, in the bathroom, strung from lights. Paper was strewn everywhere. Desks were turned over. It was a mess. Our teacher told us that a leprechaun had come to make some mischief. I think we found gold coins, if my memory serves me right. It was a very fun day.
So the tradition carries with my own children and there is chaos in our house on St. Patrick's Day!
Since then, we have added leprechaun traps to try and catch that naughty leprechaun! So far no luck. Some years, we have made fancy traps, but many years my kids have gotten their own supplies and created whatever they could (Look back at this post and you'll see the simple one at the bottom with green dots to lure them in). I think it is so valuable for kids to use their imaginations and creativity to come up with things. Last year, my kids took cereal boxes and string to create this box. When the leprechaun knocked the string or stick down, the box trapped him inside. They even put green M&Ms there to lure him in. Still no luck!
One year, they simply had string all throughout my house connected to doors so when one opened, the other closed. It was quite meticulous.
But some years we have been ambitious and made this one that we found on Family Fun and posted last year. The years we have worked together as a family have been very bonding and fun. It just depends on what kind of year, month or day you are having! So here's my sister's cute trap from last year if this is one of those years you want to be more ambitious!
Supplies needed:
Cylinder container (there are lots of options in my food cupboard, oatmeal tubs work great)
Green paint
Paintbrush
Toy wooden ladder (or make your own out of sticks)
Green Beads
Shamrock shape cut out of cardboard
Various shades of green paper torn up
Glue
Stick
Green pipe cleaner - this is sparkly green
String
Gold Coin
Instructions:
1. Paint the cylinder container green and let dry.
2. Glue individual torn papers of green paper onto pre-cut shamrock shape. Continue to glue and overlap until the entire cardboard shamrock is covered. Let dry
3. Cut a square flap/opening out of the top of the shamrock.
4. Wrap green pipe cleaner around the stick in a spiral. This may take 2 or 3 pipecleaners.
5. Tie a string (you can glue the string also) to a gold coin and tie the other end to the top of your stick.
6. Wrap green beads around your ladder for decoration.
7. Attach the shamrock to the cylinder container with glue or tape.
8. Place the stick inside the flap on the top of the shamrock and place the ladder against the tophat.
They say a leprechaun will do anything for a piece of gold! Hopefully he will fall in your trap door and you'll be lucky!
For more St. Patrick's Day ideas, crafts, treats, and lesson plans, see our St. Patrick's section!
The kids are finishing up the leprechaun traps for the evening and full of excitement... below are some of our fun St. Patrick's Day treats we made today for fun! Go here for our past treats...
Some of my favorites- You make these by placing pretzels on a cookie sheet. Then place a hershey kiss on top of each pretzel. Bake at 200 degrees for 5-6 minutes, until the chocolate is soft. Then place a green m&m on top and squish the chocolate down. Cool down (preferably in the fridge for about 5 minutes, longer if out of the fridge). Yum!
These are very simple leprechauns hats. I use grasshopper cookies (girl scout cookies would work too) and reeses peanut butter cups. I took the foil off of the reeses peanut butter cups and then placed it upside down. Then you can cut a square with a hole out of it from green or gold paper to make a buckle. I suggest you glue this onto the paper on the reeses peanut butter cup or it will fall off.
Hope you enjoy some of the fun St. Patrick's Day activities. Look here for Rainbow activities, here for shamrock printables, and here for fun games, songs and lesson plans to celebrate the big day!
Since St. Patrick's Day is Saturday, I'm going to skip ahead in the alphabet to the letter R to share our fun rainbow unit that would go great along with a St. Patrick's Day theme.
The Books We Read
During our rainbow unit, we read several some imaginative books about rainbows. All of these books reinforced the colors of a rainbow while telling enjoyable stories.
A Rainbow of My Own by Don Freeman
This is a creative book about a boy who imagines what he would do if he had his own rainbow.
Elmer and the Rainbow by David McKee
When the rainbow comes out and is missing its colors, Elmer the elephant decides he is going to give his colors to the rainbow. My kids enjoyed this cute story featuring fun jungle animals, and I always like a book that has a good message.
The Leprechaun Who Lost his Rainbow by Sean Callahan
This book was another that had a good lesson about giving--a girl sacrifices many things she has in order to help a Leprechaun build a rainbow. Since we did this unit right before St. Patrick's Day, it was a fun way to incorporate the legends about leprechauns into our unit.
Duckie's Rainbow by Frances Barry
This is a very simple book, but my kids enjoyed the bright colors and rainbow shape of the book.
Keep reading for a couple of other books we incorporated into other specific parts of our unit.
Learning the Letter
To reinforce the shape of the letter R, as well as rainbow colors, my two year-old created a Rainbow R. He is learning to cut along a straight line, so I drew lines on different colors of paper for him to cut. Then, I helped him glue the colors in order to a piece of white paper and then I cut out the shape of an R from that. Throughout the week as we reviewed the color spectrum, we were able to refer back to that craft and name the colors. We also referred to it as we reviewed the sound of the letter R. (My 4-year-old wasn't interested in doing that craft, and that was fine with me. While I was helping my 2-year-old with our letter R craft, my older son was happily drawing pictures of trains).
Science
For our rainbow unit, I once again pulled out one of my old science teaching files about light and adapted it to teach a few of the concepts to my children. Here's a brief summary of our science lesson about light and rainbows:
How do we see colors?
First, I briefly explained light and how it is through light that we see every color around us. We didn't go into depth about this. I just told them that the light reflects certain colors back to our eyes.
What happens when we mix colors?
Then I asked them, "What would happen if we mixed all of the colors of light?" If we mixed paint, I reminded them, we know that it makes a muddy brown, but light is different. When you mix all of the colors of light, it makes white light. Hidden inside the white light all around us are all the colors of the rainbow. But we can't see the separate colors of the rainbow unless we bend them.
Refraction Demonstration
I showed them a simple demonstration of how we bend light by using a straight straw and a clear cup that was half filled with water. Even though the straw was straight, it looked bent when we put it in the water. That is just the light bending, I told them. When we bend light, it is called "refraction." Then I asked my kids if they wanted to bend even more light. I showed my kids a prism, and together we went outside and used a prism to create a rainbow on a piece of white paper that I put on our patio. As I held the prism, we named the colors of the rainbow, and I taught my children the colors "indigo" and "violet" (as they are used to just purple).
Movie
I told them that sometimes people remember the colors of the rainbow by imagining a rainbow person named "Roy G. Biv." We watched this fun movie with a song about the color spectrum.
The song from the video was stuck in our heads for days.
Rainbow Diffraction Glasses
Later, we went inside and found more rainbows inside our house by using these fantastic rainbow diffraction glasses to look at lights around our house (another souvenir from my science teaching days!)
Rainbows in the Rain
"So why do we see rainbows when it rains?" I asked. I taught them that the raindrops are like a giant prism, bending the light that comes from the sun. So you have to have both sun (light) and rain (prism) at the same time to make a rainbow in the sky. I did a simple demonstration of this kind of a rainbow by spraying a water hose in the backyard and showing the kids the rainbow that formed from that.
Milk Rainbow
While this wasn't related to rainbows formed from light, my kids also loved doing this milk rainbow demonstration. Simply fill a shallow dish with milk, put a few drops of each color of food coloring near the center. Then, put a q-tip saturated with dish soap in the center of the dish and watch the colors mix and the rainbow swirl! My boys were so impressed with this--we ended up repeating this demonstration five times.
We also read the book The Rainbow and You by Edwin C. Krupp
to reinforce some of the scientific concepts we learned about rainbows as well as to learn some other facts and legends associated with rainbows.
Art Project
In addition to the Rainbow R I mentioned above, we also did a rainbow sponge painting. I helped the kids paint the colors of the rainbow in order on a sponge and then let them use the sponge to paint all over their papers with the rainbow sponge however they wished.
Field Trip
We read the book, Colors Everywhere: A Guess How Much I Love You Storybook
and then for a "field trip" we went on a walk outside and searched for items in our yard that were every color of the rainbow. I gave my kids a little basket to pick up fallen items that they wanted to collect. We couldn't collect everything we found, but we still pointed out all of the colors--the blue sky, the violet flowers, the green grass, and more.
Sensory Tub
-->
We created a sensory tub with gelatin in all of the rainbow colors. My kids loved squishing the gelatin around, scooping it up, smelling it, tasting it, forming it into a mountain and more. This was one sensory tub that even baby sister could enjoy, too. Here's a video showing the kids with the sensory bin:
Snacks
For snacks during our rainbow week, I made rainbows out of colored goldfish, with marshmallow clouds. Another day, we had some rainbow pancakes with whipped cream clouds. And for a special treat, we made rainbow cupcakes--we just bought the cupcake mix that had rainbow colored sprinkles mixed in. My boys loved helping bake these. I liked how the cupcake mix had images as well as words. I showed my son the picture of the eggs and asked him, "How many eggs do we need to add to the mix?" My son counted the eggs on the picture, 1-2-3, and excitedly said, "We need 3 eggs!" It was a great practical life and math lesson in one.
Songs and Games
The kids love having items to hold when we do music time, so together we went out into the backyard and collected sticks. Then I tied rainbow-colored strings to those sticks to create "rainbow wands." They danced around with their rainbow wands as we sang our favorite songs about colors and rainbows. My two-year-old's absolute favorite song is "I Can Sing a Rainbow," so we spent a lot of time singing that. It did confuse my kids a bit as to the order of the color spectrum, but that didn't stop us from singing and dancing to it. I like the song because it just represents the joy of colors all around us. We even made up different versions of the song, sometimes singing the colors in the spectrum in order, other times adding some of our other favorite colors, such as turquoise. Here's a clip of us singing the song together:
We also watched this classic clip of the "Rainbow Connection."
Finally, we played this simple Color Bingo game. It was very easy--my kids already know their colors quite well, but they still loved it and wanted to play it again and again. It was a super short and fast game, so it is great for little kids with short attention spans. We played it quite a few times, switching which card each person had each turn.


