Showing posts with label science. Show all posts

7.10.2013

B is for Butterfly Preschool Unit

We have had an amazing time studying butterflies this last month. It has been a perfect at-home preschool unit for my children ages 2, 3, and 5.


Learning Letters and Numbers

If you are working on your ABC's a great resource for the B is for Butterfly unit are these free B is for Butterfly printables from Confessions of a Homeschooler. These include tracing, counting, and other butterfly-themed activities

Books to Read

Below are a few books we read as we studied butterflies!


National Geographic Readers: Caterpillar to Butterfly
This is a good non-fiction easy reader about butterflies. It is short enough for young kids to listen to or read on their own but still full of interesting facts.

Caterpillar Spring, Butterfly Summer
This fun pop-up book is great for the youngest kids. My two-year-old loved it, but even my five-year-old thought it was a fun book.

The Very Hungry Caterpillar
This is a classic that my kids love. However, if you are being scientifically accurate, you should note that butterflies do not form cocoons--the correct term for a butterfly is a chyrsalis. I had to make this correction with my kids but it led to a good discussion about the differences between cocoons and chyrsalises as well as the differences between butterflies and moths (which do form cocoons).

Butterfly Garden (Robin Hill School)
This was an easy reader that my oldest son could read independently. Yet it was also enjoyable for all of my children because it described a process of growing butterflies in a classroom, very similar to what we did in our own home.

Butterfly Tree
This showed the wonder of a little girl who saw a group of migrating Monarch butterflies. It was very poetic with beautiful illustrations.

Hands-on Activity

We grew our own butterflies. This was an amazing experience. All of my children loved checking on our caterpillars every day and watching them grow. They were so excited and filled with wonder, seeing the things that they had read about in our books happen in front of their eyes. As a mom, I was just as excited to watch the changes.  You can buy your own Insect Lore Butterfly Garden to grow butterflies at home. (Note: The kit comes with an empty butterfly pavilion and a certificate for you to mail in to receive 5 live caterpillars. There is an additional $5 shipping charge when you redeem your certificate for the caterpillars. The experience of growing your own butterflies is well worth it!)


At the end, we had a party with friends to celebrate butterflies and release them. The butterflies were docile enough for my older kids to hold on their fingers. I used a q-tip dipped in sugar water to help my two-year-old pick up a butterfly before releasing it.

Pretend Play

It is fun to act out the stages of a butterfly's life. Pretend to be a caterpillar and wiggle around on the floor. Curl up into a pretend chrysalis and then emerge as a butterfly and pretend to fly around. You can make your own butterfly wings if you want to add to the fun. You could even pretend to with your proboscis (a regular drinking straw would be a perfect proboscis), just as we did in our B is for Bee unit last year.

Snacks

When our butterflies were ready to release, we invited a few friends over to help us release them. I made butterfly shaped sugar cookies (my favorite sugar cookie recipe is here), and the kids each decorated their own cookie.


For a slightly healthier butterfly-themed snack, we also had colored goldfish in plastic baggies that were clipped together in the middle. You could also do this with colored cereal or fruit.


I also love this edible butterfly life cycle.

Crafts

Probably the most common butterfly craft you might have seen is the tissue paper butterfly. We have done several variations of this butterfly craft. For a basic butterfly, use tissue paper as the wings, and then cinch up the center and create a butterfly body with a chenille stem.
For my daughter's butterfly above, we left a small loop at the bottom of the butterfly's body so she could wear it like a ring. My sons decorated coffee filters instead of tissue paper and then cinched them up.
You could also use a clothespin instead of a chenille steam to hold the butterfly's body together.

Another fun craft and pretend play prop is butterfly wings. You can use regular cardstock, butcher paper, or even old file folders.

Above is my son with his butterfly wings made from an old file folder that he created at a class at our local nature center. As part of this craft, the teacher also talked about symmetry and encouraged all of the kids to make their designs symmetrical.

Song

My kids enjoyed dancing around to this song based on The Very Hungry Caterpillar by Eric Carle. Note that it does relate the incorrect term "cocoon" instead of "chrysalis" just as the book does, but it is still a lot of fun.


The kids sang to this song at our local library and the librarian prepared foam butterflies on sticks for each of the kids to wave around as they listened to the song.


Field Trips

It just so happened that when we were studying butterflies, there were several free and fun community programs that went along with our theme. We went to a butterfly program at our local library and a class about butterflies at our local nature center.

We also went to the Butterfly Pavilion at the Natural History Museum near us. There were many amazingly beautiful butterflies to see up close!

Our study of butterflies was definitely one of our favorite units we have done. For more of our A to Z lesson plans, you can visit our Lesson Plans page here!

-->

4.29.2013

Lesson Plan: Introduction to Archaeology for Kids

We have a membership to the Discovery Science Center here in southern California which recently had an exhibit about Indiana Jones and the science of archaeology. Our visit to that exhibit made my five-year-old excited about archaeology, so we decided to do our own study of archaeology at home.

Introduction
As a starting point, we read up some more about what archaeology really is all about. We loved the picture book Archaeologists Dig for Clues by Kate Duke--This book might be a bit long for young kids but if your kids are interested in the topic, they will find this a fun and informative introduction to archaeology. Also, while it is written in a way that kids can enjoy and understand, I still learned new things as an adult. We also read introductory pages about archaeology from a history encyclopedia.

Activity
After reading about archaeology, we went on on archaeological dig in our backyard. First, we set up a grid with stakes and caution tape in our sandbox (I had leftover caution tape from our construction-themed birthday party, and we had a lot of wooden stakes sitting around from my husband's work on our yard). We created a very simple grid with just four cells. Then my kids dug in the sandbox and we made notes of what we found in each cell. (I didn't prepare ahead of time by burying things because I just let my kids dig up toys that they had previously buried by themselves just in their day-to-day play). If you don't have a sandbox, you could also bury a few objects in a patch of plain dirt that you don't mind having disturbed. If you were to set up the dig in advance, you might even have layers of items with the "oldest" items being at the bottom. Here is an image of my son's findings in our archaeological dig.
He didn't draw items to scale or make any notes other than drawing pictures of what he found and which area he found them in. But I thought that if I did this again I would have him go further and measure the sizes of each item to incorporate some math into the activity.

My son then had the idea to create his own "radiocarbon dating" machine (we had read about these machines in our books about archaeology), so he set up some chairs and tinker toys and pretended to study the "artifacts" in his machine.

Snack
We didn't have a special snack when we studied archaeology, but our Dinosaur Lesson Plan had a fun edible snack while doing an "paleontology dig" and I think this lesson plan that involves a simulated archaeological dig with a 3 layer cake sounds so cool! They would be fun ways to incorporate a snack and a lesson in one!

Game
We had fun playing this online "Tools of the Trade" game from the American Museum of Natural History website. There are more fun activities to check out on that website as well.

Field Trip
As I said--it was our field trip to the science museum that first sparked our interest in archaeology. But we finished up by going to the La Brea Tar Pits and Page Museum in Los Angeles--which is a working excavation site right in the middle of our big city--though technically this fits within paleontology, not archaeology as they have excavated prehistoric animals there--nothing human. Still the way the pit was set up in grids and the way the "fishbowl" lab was set up was exactly as we had read about in our archaeology book, so my kids loved seeing that!


Don't forget to enter our giveaway before May 10 for a free family pass to the Princess Festival! 11 easy ways to enter! 
 
-->

2.20.2013

St. Patrick's Day Lesson Plan #2

My kiddos were so lucky to have a year of "Grandma School" with their cousins.  Grandma did a preschool activity with them weekly and it was the highlight of their week.  So here are some of her fun ideas for St. Patrick's Day!

Arts and Crafts
Tissue Shamrocks:


These are done by cutting squares (about 1"x1") of green tissue paper.  She used different shades of green tissue paper for variety.  
Place the squares on the bottom of a pencil eraser.  Then dip the end into a pool of glue (I put it on a paper plate).  Place the tissue with glue end on a shamrock shaped template.  You can do this as many times as you want to fill the entire template.Then cut the shamrock out and voila, you have an adorable 3-D craft!

 
Science
Color Explosion Experiment:


Watch the above video to see the kids in action - they LOVED this!  The kids used a pie pan full of milk and dropped various drops of food coloring in.  Then taking a cotton swab dipped in dish soap, you can make all the colors explode and create a tie-dye sort of look.  Check out a very detailed explanation on why this occurs at one of my favorite Science websites:


 Storytime

Lots to choose from, but here are a few ideas...
 

Song
I Can Sing a Rainbow:


  I can Sing a Rainbow is a favorite amongst grandma and her grandkids.  This time, two cute grandkids taught the others how to do the sign language along with the music (Here's a great video we found online that demonstrates it).  I was impressed with how long the 2-3 year olds stayed at attention.  It's all about teaching them kinesthetically or hands-on!

Game
Bingo
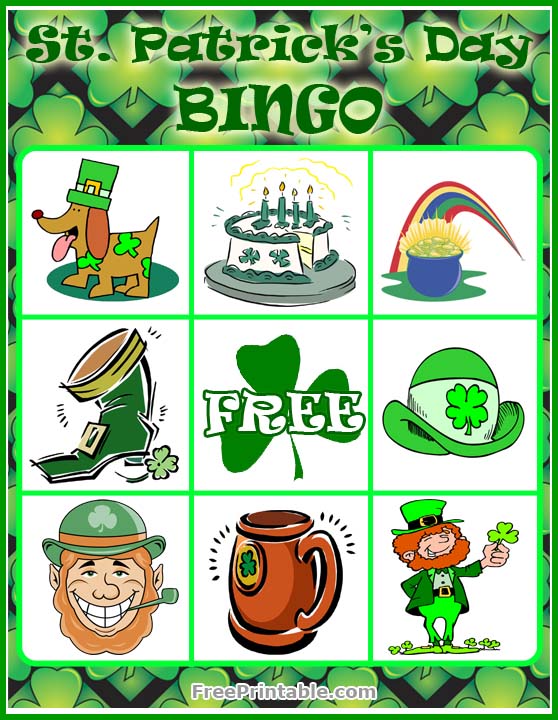
 St. Patrick's Day Bingo - there are countless free printables online, here are some of my favorites:

Bingo Version 1
Bingo Version 2
Bingo Version 3


Want more ideas and fun to celebrate leprechaun mischief??
R is for Rainbow and  Shamrock Printables and St. Patrick's Day Lesson Plan #1
See our St. Patrick's Day section for more crafts, treats, lesson plans and activities!

-->

2.12.2013

Science Lesson Plan: States of Matter


Before I had kids of my own, I spent a summer as a science camp teacher. I loved doing hands-on activities with children to teach them about science. Some of the parents jokingly called our science camp "toy camp" because most of our science lessons had some sort of hands-on toy that we gave the children which was associated with the concept of the day. That's the great thing about science. We can find science experiments all around us--even in our toys--it isn't just some boring thing we read about in textbooks. 

Later, after I was no longer teaching summer camp, some of my friends who were teaching their children at home asked me to be a "guest teacher" for their preschool and kindergarten age kids. So I adapted one of my lessons about states of matter for the children. This lesson was a big hit with the kids.

States of Matter Lesson Plan
Objectives:

(1) Students will be able to identify the difference between solids, liquids, and gases.
(2) Students will be able to understand that matter can change from one state to another.

Key Terms:
  • matter
  • molecule
  • solid
  • liquid
  • gas
Materials Needed:
  • magnifying glass
  • random small objects to observe
  • containers with solids, liquids, and gases
  • test tube
  • balloon
  • baking soda
  • vinegar
  • diet coke
  • mentos
  • handouts
  • scissors
  • crayons
  • glue
Lesson Activities:

Matter and Molecules

First, I introduced the term "matter." I taught the students that matter is all of the "stuff" around us. I had students take turns pointing to matter that they saw in the room.

Then I introduced the idea of molecules. I had the kids look at a few items of matter through a magnifying glass and see if they could notice anything different looking at the items closely. Some things you don't notice about objects until you look at them with a magnifying glass. Molecules are so small that we can't see them even with a magnifying glass but they are still there. Everything around us is made out of tiny invisible molecules.

States of Matter

Next, I taught the different types of matter. I did a human demonstration in which the kids became the molecules. First I had them stand close together making a wall. I had them stay still, and I showed them how I couldn't get through their wall. I explained to them that they were acting like a solid. We defined a solid and identified other solids in the room. Next I had them spread a little bit apart. They were allowed to move a little, but not very much. I showed them how I could "swim" through them because they were acting like a liquid. We defined a liquid and identified liquids in the room. Finally, they became gas molecules. They loved spreading out and running around. I showed them how easy it was for me to run in between them. We defined a gas.

To test their knowledge I pulled out containers with different objects. I had old baby food containers that I filled with random liquids and solids. I also had one empty container to represent gas. I let the kids take turns choosing a container. Each child opened the container and got to examine the object inside. Then, I quizzed them on whether that object was a solid, liquid, or gas.

Changing Matter

I introduced the idea of changing matter by talking about super heroes. Super heroes have many different talents--some can fly, some can turn invisible, some have super strength. We get to be super heroes today by becoming matter changers (just like Frozone in The Incredibles). I had the kids chant "1-2-3 Matter changers!" with me.

I then taught students about how matter can change from one form to another. I explained the example of an water, ice, and steam. We talked about how when we are cold we like to cuddle up in blankets to get warm. But when we are hot, we like to run around and have fun. Molecules are the same way. When they get cold, they get closer together. When they get hot, they spread apart. When can change matter by making it hot or cold.

I then told students that we can change matter in other ways. Sometimes when you mix two different things you can make a new thing--like when you bake cookies. You can do that with matter. You can take two kinds of matter and turn them into a different kind of matter.

I pulled out the balloon, baking soda, vinegar, and test tube. I had the students look at each item and decide whether the item was a solid, liquid, or gas. Then, once they had observed the baking soda and vinegar, I used a funnel to pour some baking soda into the balloon and some vinegar into the test tube. Then I attached the balloon to the test tube. We did our chant "1-2-3 Matter Changers!" and I lifted up the balloon to allow the baking soda to drop inside and mix with the vinegar. The reaction of the baking soda and vinegar caused the balloon to inflate on its own. I explained to the students that the solid and liquid had created a gas that was now filling the balloon. A video of my preschool aged boys doing this demonstration is below:


Playing with Matter

For our finale, I took the kids outside to play some more with matter. On the way out, we identified solids, liquids, and gases around us. Then, I pulled out the materials for our last experiment. I had a bottle of diet coke a pack of mentos. I also used the special test tube below:
  
I had students identify states of matter one more time. I explained that the diet coke actually had both a liquid and a gas in it. The bubbles were the gas. I had the kids guess what they thought would happen if I mixed the solid mentos with the liquid soda and gas bubbles. Then, we loaded a pack of mentos in my test tube and dropped the mentos into the soda. The kids loved watching the diet coke geyser shoot up in the air. I explained to them what had happened. When we dropped the mentos in, the gas bubbles all stuck to the mentos. Because the gas bubbles were jumping around taking up so much space, there wasn't enough space for the liquid in the bottle anymore. So the liquid was pushed out into a fountain. After the explanation, we tried the experiment one more time.

And just in case, you've never seen this demonstration before, here's a classic video of diet coke and mentos geysers in action.


Review

For a review activity, I had students color a solid, liquid, gas handout that I had made. Then they they found pictures of items that represented each state of matter and glued them on top of the corresponding state of matter. I had some clipart of several items I had found from searching online already printed for the kids to sort. You could also have them look through magazines or advertisements for items to fit into each category.

Some examples of pictures of items that would fit each category:

Liquid: juice, water, soup, soda
Solid: car, apple, watch
Gas: wind, steam, bubbles

Below is an image of the States of Matter handout I created that you could print out to go with this activity:


We had a lot of fun experimenting with solids, liquids, and gases. For more ideas for teaching your kids about science, check out my Science Pinterest Board.

-->

1.20.2012

Electricity Lesson Plan


This was an elementary school lesson plan that I adapted to teach to my preschool aged children along with some of their friends.

Atoms and Electricity
Science Lesson Plan

Key Terms:

Atom
Electron
Electricity
*Static
*Current
Circuit
*closed
*open
Conductor
Insulator

Materials needed:

Straight pin
Proton/Neutron/Electron signs (PDF included if you click on the link)
Candy/Frosting/Paper plates
Two strong magnets
Balloon
Styrofoam cup
Small pieces of paper
Circuit board kit with light bulb, battery, & wires
Random items to test conductivity
Christmas light strand
Circuit ball
Circuit boards
Circuit handout (PDF included below)
Crayons or markers

Lesson Plan:

Introduction: Did you know that everything around us made of tiny, invisible things called atoms? Atoms are very, very small. They are smaller than an ant, smaller than a speck of dust. Atoms are so small that we can't see them with our own eyes or even with a magnifying glass. Atoms are so tiny that you have to have a really special, powerful microscope to see them. There are atoms in the floor and on the table and in the chair and on the door. Do you see this tiny pin here? Guess how many atoms are on this pin? Do you think there are 10 atoms? 100 atoms? 1000 atoms? How about five million atoms? That's right--atoms are so tiny that five million atoms could fit on one tiny pin. That's why we can't see them very well.

Atoms are made up of even smaller pieces. Each atom has three different parts called protons, neutrons, and electrons. We are going to pretend to be an atom.

Create a human demonstration of an atom. Pass out proton/neutron/electron signs. Have each child be a different part of the atom--protons and neutrons in the center nucleus with electrons running circles around the nucleus.

Now let's make a model of an atom that you can keep. We are going to use candy to do this… You don't get to eat the candy right now, but at the end of class if you remember what I've taught you, I may hand out some of the extra candy!

Use candy, frosting, and paper plates to create models of atoms. -Protons and neutrons are mints or other medium-sized circular candies. Electrons are m & m's or other small candies--they should be noticeably smaller than protons and neutrons. You could also -use pull-and-peel Twizzlers to create lines in the electron cloud to show movement.

Now that you know all about atoms, we are going to talk more about those crazy little electrons that jump around on the outside of atoms. Why do electrons move around so much? Well, for one reason, electrons don't like to get close to each other. If another electron comes too close, then the electrons move out of the way. Sometimes electrons move around so much that they even jump from one atom to another. When electrons move like this, they create something called electricity. Who knows what electricity is? Electricity is just the movement of electrons. Electrons--Electricity--that's why the two words sound so alike.

At this point, you could use several strong magnets to demonstrate how electrons repel each other.

Anything that uses a battery or plugs into a wall to work uses electricity. Can you find something in this room that uses electricity? [Answers might include a computer, TV, lamp, etc.] There is also a special kind of electricity called static electricity that doesn't even need a battery. Let's learn about at static electricity first.

Have you ever walked across a carpet floor in thick socks and then touched a metal door?
Did you feel a little spark go through you? That spark was electrons. When you walk on the floor you rub off electrons and create a little collection of electrons. But remember that electrons do not like to get close to each other. When you collect too many electrons you build static electricity and the electrons look for a way to escape. When you touch metal, the electrons escape and you feel a little spark of electricity.

Let's look at some other types of static electricity:


Balloon/hair demo
Rub a balloon on shirt
Watch it make hair rise and see how it can stick to things because of static electricity…

Styrofoam cup experiment
Break up little pieces of paper
Rub a Styrofoam cup on hair/shirt/etc. so it builds up static electricity
Move the Styrofoam cup over the little bits of paper and watch the paper "jump" because of the static electricity.
(You can also do the same with a balloon if you don't have Styrofoam).

Static electricity is a lot of fun, but the kind of electricity we use most in our life is different. The other kind of electricity is called current electricity. That's the kind of electricity that uses batteries or plugs to work. Batteries are just special storage containers for electrons. When you connect a battery to a wire the electrons will travel through the wire. Then, they can make a light go on or a buzzer ring.  Let's look at how it works.

Light bulb demo… Connect a light bulb to a battery with wires. [I used a circuit board kit].Watch it light up.

Electrons only like to travel through certain types of things. If you put a rubber ball up to a battery, nothing will happen. But if you used tinfoil to connect a battery and light bulb, the light would go on. Let's experiment to see what kinds of things electrons like to travel through.


Conductivity experiment: Test different items to see which things complete the circuit and make the light go on. Sort the items into two groups: conductors and non-conductors.

In order for electricity to work, you also have to have what is called a closed circuit. That means you have to have a complete circle connecting the wires to the battery to the item you are turning on. If the circuit gets broken, the light won't work.

Let's look at some Christmas lights for example. If I take out one of these Christmas light bulbs the rest of the chain won't work. (Take out one light). When I took out the light I broke the circuit. If the circuit is broken it is called an open circuit and the electricity doesn't work. To help the electricity work again, we need to make a closed circuit again! (Put light bulb back in).

Did you know that human beings can conduct electricity? That's why we have to be so careful around plugs and sockets. It could really hurt to be electrocuted. That's when too much electricity enters a human and injures them. I have a special electricity ball though that won't hurt you. Let's see if we can make it conduct electricity.

Use circuit ball.
  
Create a circle adding one person at a time holding hands all around. Demonstrate how a circuit works. What happens if one person lets go? The balls turns off. That's because we broke the circuit. But when we are all holding hands then we create a closed circuit and the electricity flows to the ball and makes it light up.

When you have lots of circuits, you can create something called a circuit board. Circuit boards are in all of the electric things around us.

Show samples of circuit boards. [We have a lot of actual circuit boards because my husband likes to take apart old broken electronics ]

In your house you have lots of wires inside your wall that conduct electricity. When you plug something in you are connecting it to a huge circuit. Sometimes when there is a storm, the circuit can be broken. Maybe a power line falls down or something else gets in the way of the circuit. Then you lose all of your electricity! Has that ever happened to any of you? Electricity is pretty important! Without electricity we couldn't do many fun things like watch TV, listen to CDs, or hang up pretty Christmas lights.

This would be a great time to stop to read and discuss a book such as The Magic School Bus and The Electric Field Trip by JoAnna Cole.

Okay, we're done with our lesson for now. But let's review to see what we learned today…
What are atoms? What are electrons? What is electricity? What is a circuit? What kinds of things conduct electricity?

Review and discuss key terms. Maybe give the kids a candy or small prize if they remember key points from the lesson.

Okay, I just have one more assignment for you. Here is a picture of a light bulb and a battery. But the light bulb can't shine yet, because it has an open circuit. I want you to close the circuit and color in the light bulb so it can shine! On the back of the handout, you can draw a picture of your favorite thing that uses electricity. Have fun!

Extensions/Adaptations:

With younger kids, you may want to skip over some of the discussion of atoms and just say that electricity is created by the movement tiny particles called electrons. You could also simplify some of the other explanations. For older kids you could explain series and parallel circuits as well. You could also tell some stories about the history of electricity... Franklin, Edison, etc. Also, if you have a circuit board activity kit you can enjoy experimenting with different projects at the end of the lesson.
-->

1.13.2012

Back to School Lesson Plan: E is for Electricity!


E is for electricity Unit
by Rachel Hoggan

This was one of my favorite "preschool" units with my kids! Their dad is an engineer who works in a lab building circuit boards for satellites, so I had fun involving him in teaching the kids this week.

Literacy
As usual, we learned the shape and sound of the letter E. My kids do not like doing ordinary letter tracing worksheets--probably because they are young and still developing fine motor skills. Each week, I try to find different ways to have my kids get familiar with the shape of the letter. We build the letter out of blocks, chocolate chips, push pins, or magnets. We sometimes trace the letter in sand or shaving cream. Or we work on it outside as we are playing with our sidewalk chalk. For electricity, we made a letter E out of tinfoil because tinfoil is a conductor. Another simple game we often play to practice our letter sounds is "I spy." As I'm driving in the car to and from soccer or the library or the grocery store, I will say "I spy with my little eye, something that starts with the letter ____ (or the sound "___").

Books

The Magic School Bus and the Electric Field Trip by Joanne Cole
This book is definitely geared towards older school kids--a lot of concepts are too advanced for a preschooler. But the Magic School Bus series is great, and even if they didn't understand everything both my boys LOVED it. We read it several times, and they continued to ask for more Magic School Bus stories after this.

Electricity (DK Eyewitness Book)

We definitely didn't read every word of this book, but this was a handy reference with plenty of pictures and detailed information that I was able to refer to as we learned about electricity. Great for an older child, but still enjoyable for a younger child if you choose appropriate sections that your child can understand.

Another book that we didn't read but that looks good is the following:
Switch On, Switch Off


We also checked out quite a few other books out of the juvenile nonfiction section--especially some fun books with hands-on electricity experiments to try at home.

Math
My kids are getting better at counting, but they are still working on their numeral identification, so we practiced identifying numbers on the different circuit boards we looked at. We had a lot of circuit boards that I had collected for the lesson (my husband works in electronics LOVES to take apart old electronic devices and save the circuit boards). Some of the numbers were hard to see but all of the circuit boards had numbers on them in one place or another, so it was a fun number treasure hunt.

Science
Obviously, this unit was heavily science-based. We loved learning about both static and current electricity. I adapted a lesson about electricity that I had previously prepared a few years ago for older children in mind. Even though my children are young, they still loved it! For all my detailed science lesson on electricity--keep reading. The science lesson for this unit is included in the next post.

Craft
I made up a simple coloring page for the boys to review the concept of circuits.

And the boys had a fun father-son project (well more of a project done 99% by dad--but they learned a lot through watching him!) building a flashing siren and then painting a homemade cardboard fire engine to go around the siren.

Their dad used this kit from Amazon.com to build the siren. It was a great little kit that came with a soldering iron and solder that can be used for future projects, too.


Practical Life
We talked a lot about safety around electrical appliances. Since water is a conductor, I reminded the boys, we need to keep electric things away from water. We talked about staying away from plugs. And I reminded my son of the time he burned a hole in his wall when he dropped a coin in between his nightlight and the wall.

Field Trip
Any science museum would probably have electricity-related displays. We have several great science museums nearby. We love the Discovery Science Center in Orange County. Another fun museum is The California Science Center in Los Angeles--That museum is always free (but parking does cost money). But for our field trip this time, we went to the Griffith Observatory (also free!). The boys were quite impressed with the lightning bolts of electricity from the Tesla
Coil there.

Snack
If you are feeling ambitious and want a super cool electricity snack, try making some of these graham cracker circuit boards. I wasn't that ambitious--but maybe next time!

Music
I couldn't find a lot of children's songs to do with electricity, but we did find this electricity song online. And we are Californians and Disney fans, so we loved dancing around to the "Main Street Electrical Parade" song.

We had a lot of fun with this unit. For more ideas, see my E is for Electricity board on Pinterest!
-->